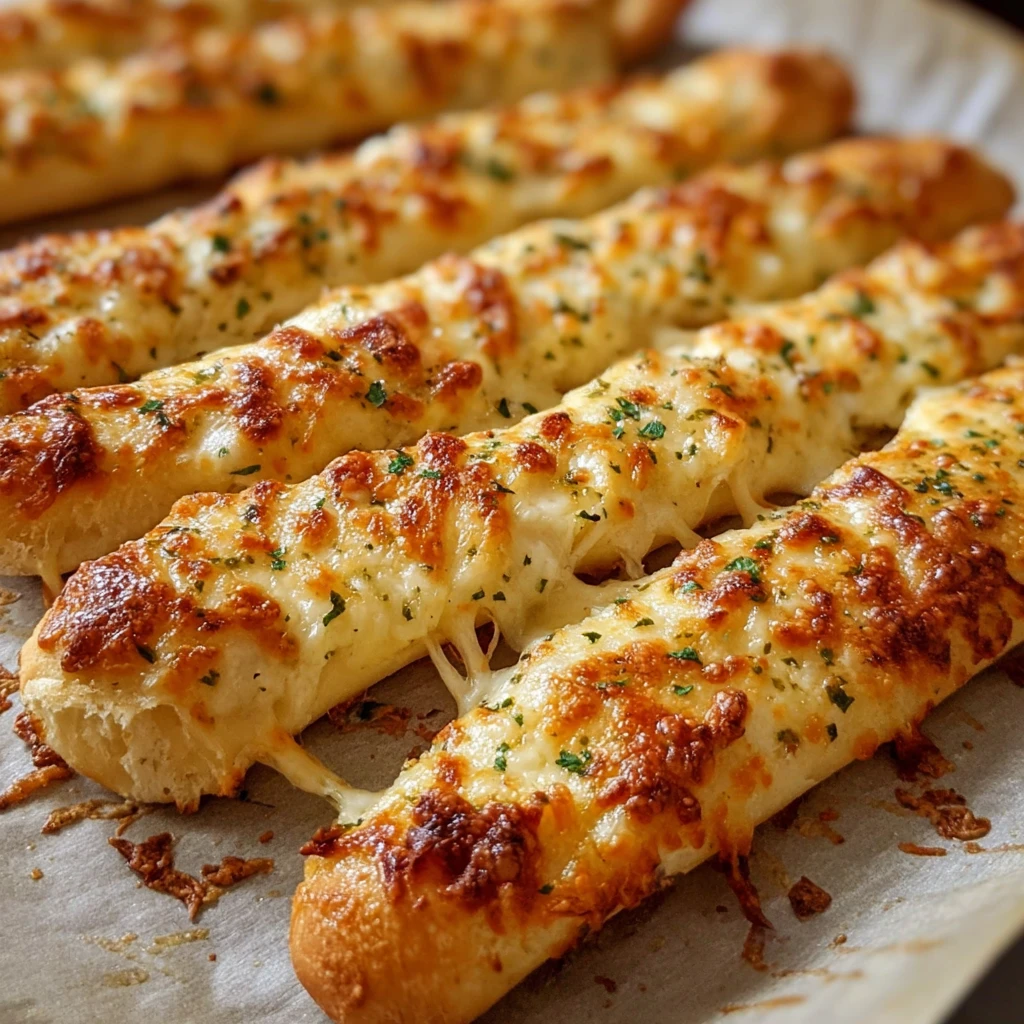
Homemade Cheesy Garlic Breadsticks
Introduction
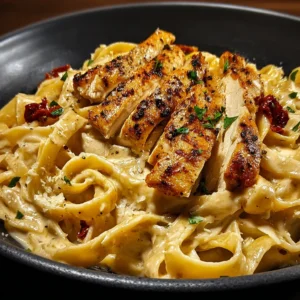
Welcome to the delightful world of homemade cheesy garlic breadsticks! Imagine the aroma of freshly baked bread infused with garlic and oozing with melted cheese. In this recipe, we will take you through the steps to create these irresistible cheesy garlic breadsticks that are perfect as a snack, appetizer, or accompaniment to your favorite pasta dishes.
What makes these cheesy garlic breadsticks so special is not just their gooey cheese topping or the aromatic garlic flavor but the satisfaction of creating something delicious from scratch in your own kitchen. This recipe is a perfect blend of simplicity and indulgence, sure to impress your family and friends at any gathering.
Garlic breadsticks have become a staple in many households, offering a comforting and flavorful treat that appeals to all ages. Whether you are a seasoned home cook or a beginner looking to expand your culinary skills, this recipe is a great way to add a homemade touch to your meals.
So, roll up your sleeves, preheat your oven, and let’s embark on a culinary journey to create the most scrumptious cheesy garlic breadsticks that will leave everyone craving for more!
Why You’ll Love This Recipe
These homemade cheesy garlic breadsticks are a true crowd-pleaser for several reasons. Firstly, they are incredibly easy to make, requiring just a few basic ingredients that you likely already have in your pantry. Secondly, the combination of garlic and cheese adds a burst of flavor that will tantalize your taste buds. Lastly, the texture of these breadsticks strikes the perfect balance between soft and chewy, making them a delightful snack or side dish.
For those conscious of their dietary choices, these cheesy garlic breadsticks can be customized to suit various preferences. You can opt for whole wheat dough, use low-fat cheese, or even experiment with vegan cheese alternatives to cater to different dietary needs without compromising on taste.
Whether you are hosting a casual get-together, a game night, or simply craving a savory treat, these homemade cheesy garlic breadsticks are a versatile and satisfying option that promises to be a hit every time.
Get ready to elevate your bread game with this delectable recipe that is sure to become a regular feature on your dining table!
Ingredients
For the dough:
– 2 ¼ teaspoons active dry yeast
– 1 cup warm water
– 1 teaspoon sugar
– 3 cups all-purpose flour
– 1 teaspoon salt
– 2 tablespoons olive oil
– 2 tablespoons butter, melted
For the garlic butter:
– 4 cloves garlic, minced
– ¼ cup butter, melted
– 1 tablespoon fresh parsley, chopped
– Salt to taste
For the topping:
– 2 cups mozzarella cheese, shredded
– ½ cup Parmesan cheese, grated
– Additional herbs for garnish (optional)
Step-by-Step Instructions
1. In a small bowl, combine the warm water, sugar, and yeast. Let it sit for about 5-10 minutes until foamy.
2. In a large mixing bowl, combine the flour and salt. Make a well in the center and pour in the yeast mixture and olive oil. Mix until a dough forms.
3. Knead the dough on a floured surface for about 5-7 minutes until smooth and elastic. Place the dough in a greased bowl, cover with a damp cloth, and let it rise for 1 hour or until doubled in size.
4. Preheat the oven to 400°F (200°C) and line a baking sheet with parchment paper.
5. Punch down the dough and divide it into equal portions. Roll each portion into a breadstick shape and place them on the prepared baking sheet.
6. In a small bowl, mix together the melted butter, minced garlic, parsley, and salt. Brush the garlic butter mixture over each breadstick.
7. Sprinkle the shredded mozzarella and Parmesan cheese generously over the breadsticks.
8. Bake in the preheated oven for 15-20 minutes or until the cheese is melted and bubbly, and the breadsticks are golden brown.
Expert Tips for Success
– Ensure the water used to activate the yeast is at the right temperature (around 110°F) to ensure proper activation.
– Knead the dough until it is smooth and elastic to develop the gluten and achieve the desired texture of the breadsticks.
– Experiment with different cheese blends or add toppings like pepperoni, olives, or sun-dried tomatoes for a unique twist.
– For a crispier crust, brush the breadsticks with olive oil before baking.
Mastering the art of making cheesy garlic breadsticks comes down to attention to detail and practice. By following these expert tips, you can elevate your breadstick game and impress your guests with this irresistible homemade treat.
Variations and Substitutions
If you’re looking to switch things up or accommodate dietary preferences, here are a few variations and substitutions you can try:
– Use whole wheat flour for a healthier twist on the dough.
– Swap the mozzarella and Parmesan cheeses for a blend of cheddar and Gouda for a richer flavor profile.
– For a vegan version, use dairy-free cheese and substitute the butter with olive oil in the garlic butter mixture.
Feel free to get creative with the ingredients and adapt this recipe to suit your taste preferences and dietary requirements. The beauty of homemade cheesy garlic breadsticks lies in their versatility, allowing you to customize them to your liking.
Serving Suggestions
These cheesy garlic breadsticks are best enjoyed fresh out of the oven when the cheese is gooey and the breadsticks are warm. Serve them alongside your favorite marinara sauce for dipping or pair them with a crisp green salad for a complete meal.
For a casual gathering or game night, arrange the breadsticks on a platter with a side of ranch dressing or garlic aioli for dipping. You can also sprinkle some fresh herbs like basil or oregano on top for an extra burst of flavor.
Whether you serve them as a snack, appetizer, or accompaniment to a main course, these cheesy garlic breadsticks are sure to steal the show and leave everyone craving for more.
FAQs
Q: Can I prepare the dough in advance?
A: Yes, you can prepare the dough ahead of time and refrigerate it overnight. Just make sure to let it come to room temperature before shaping and baking the breadsticks.
Q: Can I freeze the baked breadsticks?
A: Absolutely! Once baked, allow the breadsticks to cool completely, then wrap them tightly in foil or plastic wrap and store them in the freezer. To reheat, simply thaw and bake them in a preheated oven until warmed through.
Q: Can I use different herbs in the garlic butter?
A: Of course! Feel free to experiment with herbs like rosemary, thyme, or basil to customize the flavor of the garlic butter according to your preferences.
These frequently asked questions aim to address common queries that may arise while making cheesy garlic breadsticks. By following these tips and tricks, you can ensure a seamless cooking experience and delicious results every time.
Final Thoughts
Homemade cheesy garlic breadsticks are more than just a delicious snack; they are a testament to the joy of creating something special from scratch. From kneading the dough to watching the cheese bubble and melt in the oven, every step of this recipe is a labor of love that culminates in a mouthwatering treat.
So, gather your ingredients, set aside some time for a fun baking session, and treat yourself to the simple pleasures of homemade cheesy garlic breadsticks. Whether you enjoy them solo, with loved ones, or at a social gathering, these breadsticks are bound to bring smiles and satisfaction all around.
Embrace the magic of homemade cooking, savor the flavors of gooey cheese and aromatic garlic, and let these cheesy garlic breadsticks become a staple in your recipe repertoire. Bon appétit!
Homemade Cheesy Garlic Breadsticks
Indulge in the delightful world of homemade cheesy garlic breadsticks that are oozing with melted cheese and infused with aromatic garlic flavor. These soft and chewy breadsticks are perfect as a snack, appetizer, or accompaniment to your favorite pasta dishes.
Ingredients
- 2 ¼ teaspoons active dry yeast
- 1 cup warm water
- 1 teaspoon sugar
- 3 cups all-purpose flour
- 1 teaspoon salt
- 2 tablespoons olive oil
- 2 tablespoons butter, melted
- 4 cloves garlic, minced
- ¼ cup butter, melted
- 1 tablespoon fresh parsley, chopped
- Salt to taste
- 2 cups mozzarella cheese, shredded
- ½ cup Parmesan cheese, grated
- Additional herbs for garnish (optional)
Directions
- In a small bowl, combine the warm water, sugar, and yeast. Let it sit for about 5-10 minutes until foamy.
- In a large mixing bowl, combine the flour and salt. Make a well in the center and pour in the yeast mixture and olive oil. Mix until a dough forms.
- Knead the dough on a floured surface for about 5-7 minutes until smooth and elastic. Place the dough in a greased bowl, cover with a damp cloth, and let it rise for 1 hour or until doubled in size.
- Preheat the oven to 400°F (200°C) and line a baking sheet with parchment paper.
- Punch down the dough and divide it into equal portions. Roll each portion into a breadstick shape and place them on the prepared baking sheet.
- In a small bowl, mix together the melted butter, minced garlic, parsley, and salt. Brush the garlic butter mixture over each breadstick.
- Sprinkle the shredded mozzarella and Parmesan cheese generously over the breadsticks.
- Bake in the preheated oven for 15-20 minutes or until the cheese is melted and bubbly, and the breadsticks are golden brown.