
Old-Fashioned War-Time Cake
Introduction
Imagine being transported back in time to a cozy kitchen filled with the aroma of freshly baked goods. The nostalgia of wartime recipes brings a sense of comfort and tradition. Today, we delve into the delightful world of old-fashioned war-time cakes, where simplicity meets deliciousness.
During times of war, ingredients were often scarce, leading to creative adaptations in the kitchen. The old-fashioned war-time cake is a testament to resourcefulness and the ability to create something extraordinary out of the ordinary. This recipe has stood the test of time and continues to be cherished for its simplicity and rich flavors.
Steeped in history, the war-time cake carries with it tales of resilience and community. Baking a war-time cake is not just about following a recipe; it’s about connecting with the past and honoring the traditions that have been passed down through generations.
Join us on a culinary journey as we explore the charm and allure of the old-fashioned war-time cake, a treat that warms both the heart and the stomach.
Why You’ll Love This Recipe
The old-fashioned war-time cake is a recipe that truly stands the test of time. Its simplicity and humble ingredients make it a favorite for those seeking a taste of nostalgia. Here’s why you’ll fall in love with this classic recipe:
First and foremost, this recipe is incredibly easy to make, requiring basic pantry staples that you likely already have on hand. The result is a moist and flavorful cake that will transport you back in time with every bite.
Additionally, this cake boasts a rich history, offering a glimpse into the culinary practices of a bygone era. Baking this cake is not just about enjoying a delicious treat; it’s about honoring tradition and paying homage to the resilience of those who baked it during challenging times.
Furthermore, the old-fashioned war-time cake is highly versatile, allowing for various tweaks and additions to suit your preferences. Whether you enjoy it plain or with a dollop of fresh cream, this cake can be customized to cater to different tastes and dietary needs.
Prepare to be enchanted by the simplicity and charm of this timeless recipe as you embark on a baking adventure that transcends generations.
Ingredients
To recreate the magic of the old-fashioned war-time cake in your own kitchen, you will need the following simple ingredients:
– All-purpose flour
– Sugar
– Butter
– Milk
– Baking powder
– Vanilla extract
– Eggs
Optional ingredient substitutions:
– Whole wheat flour can be used in place of all-purpose flour for a nuttier flavor
– Coconut sugar can be substituted for white sugar for a slightly different taste profile
– Almond milk can be used as a dairy-free alternative to regular milk
Gather these basic ingredients, and let’s embark on a baking journey that will transport you to a time filled with warmth and tradition.
Step-by-Step Instructions
Follow these simple steps to create your own old-fashioned war-time cake:
1. Preheat your oven to 350°F (180°C) and grease a cake pan.
2. In a mixing bowl, cream together the butter and sugar until light and fluffy.
3. Add the eggs one at a time, beating well after each addition.
4. Stir in the vanilla extract.
5. In a separate bowl, sift together the flour and baking powder.
6. Gradually add the dry ingredients to the wet ingredients, alternating with the milk.
7. Pour the batter into the prepared pan and bake for 30-35 minutes or until a toothpick inserted into the center comes out clean.
8. Allow the cake to cool before serving.
For best results, follow these instructions carefully, and you’ll soon be savoring a slice of history in the form of a delicious war-time cake.
Expert Tips for Success
For a truly authentic war-time cake experience, consider the following expert tips:
– Make sure all your ingredients are at room temperature for even mixing and baking.
– Creaming the butter and sugar until light and fluffy is crucial for a tender crumb.
– Avoid overmixing the batter once the flour is added to prevent a tough cake.
– Test the cake for doneness by inserting a toothpick into the center; it should come out clean when the cake is ready.
By keeping these expert tips in mind, you’ll be well on your way to baking a perfect old-fashioned war-time cake that captures the essence of a bygone era.
Variations and Substitutions
While the traditional war-time cake recipe is a beloved classic, feel free to get creative with these variations and substitutions:
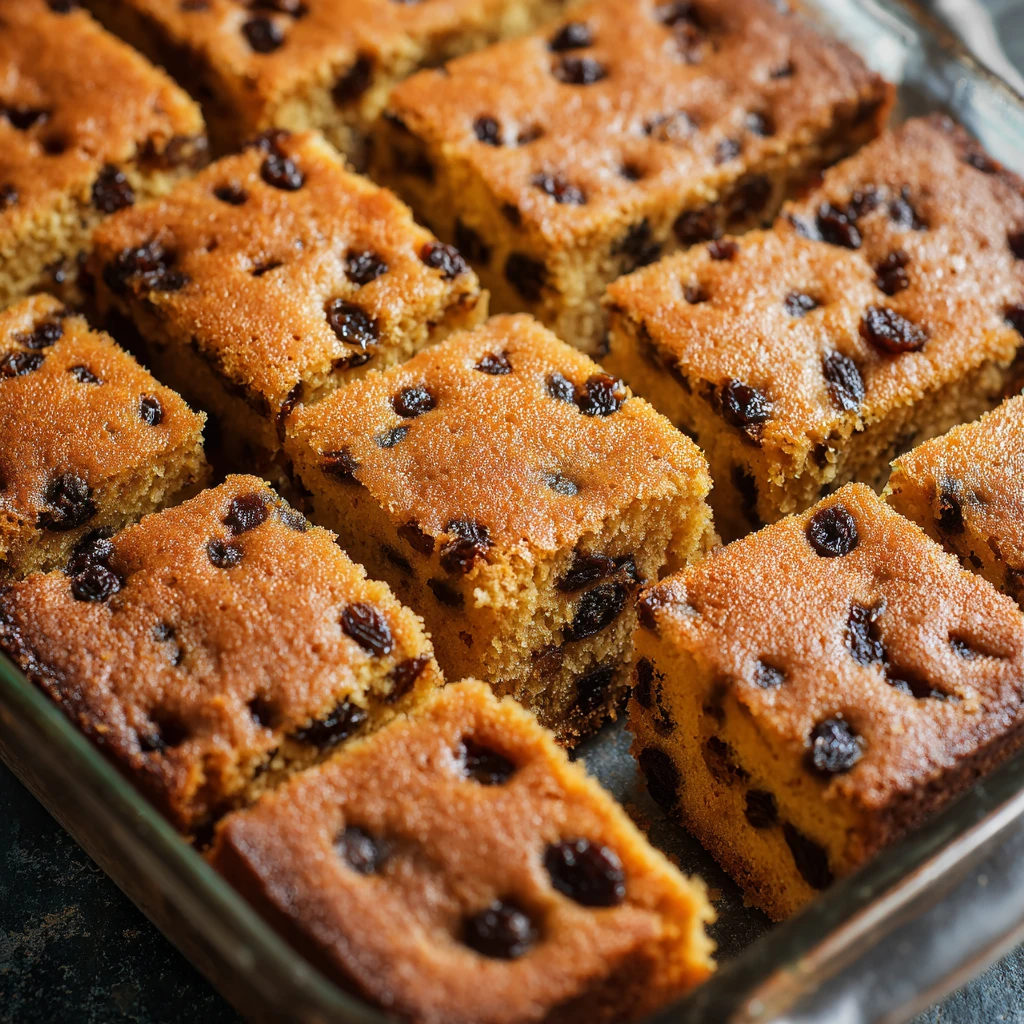
– Add a handful of raisins or chopped nuts to the batter for extra texture and flavor.
– Drizzle the cooled cake with a simple glaze made from powdered sugar and lemon juice for a tangy twist.
– Experiment with different extracts such as almond or lemon for a unique flavor profile.
– For a dairy-free version, substitute the butter with coconut oil and the milk with almond milk.
Embrace your inner baker and explore different ways to customize the war-time cake recipe to suit your preferences and taste buds.
Serving Suggestions
Once your old-fashioned war-time cake is baked to perfection, consider these serving suggestions for a delightful culinary experience:
– Enjoy a slice of warm cake with a cup of freshly brewed coffee or tea for a cozy afternoon treat.
– Top the cake with a dollop of whipped cream or a scoop of vanilla ice cream for a decadent dessert.
– Pair the cake with fresh berries or a fruit compote for a refreshing contrast to the rich flavors.
– Serve the cake as part of a traditional afternoon tea spread alongside sandwiches and scones.
However you choose to serve it, the old-fashioned war-time cake is sure to be a hit with family and friends, evoking memories of simpler times and cherished traditions.
FAQs
Here are answers to some common questions you may have about baking an old-fashioned war-time cake:
Q: Can I make this cake ahead of time?
A: Yes, the war-time cake can be baked in advance and stored in an airtight container for up to three days.
Q: Can I freeze the cake?
A: Absolutely! Wrap the cooled cake tightly in plastic wrap and aluminum foil before freezing for up to three months. Thaw in the refrigerator before serving.
Q: Can I use a different type of sugar in this recipe?
A: While white sugar is traditional, you can experiment with brown sugar or coconut sugar for a slightly different flavor profile.By addressing these frequently asked questions, we hope to make your war-time cake baking experience as smooth and enjoyable as possible.
Final Thoughts
As we conclude our journey into the world of old-fashioned war-time cakes, we invite you to experience the magic of this timeless recipe in your own kitchen. Baking a war-time cake is not just about creating a delicious treat; it’s about honoring tradition, resilience, and the simple joys of life.
So gather your ingredients, preheat your oven, and embark on a baking adventure that transcends time and space. Let the aroma of a freshly baked war-time cake fill your home with warmth and nostalgia, reminding you of the power of simplicity and tradition.
We hope this recipe brings you as much joy and comfort as it has brought to countless bakers throughout history. Cheers to good food, cherished memories, and the enduring legacy of the old-fashioned war-time cake.
Old-Fashioned War-Time Cake
Experience the nostalgia and simplicity of a classic war-time cake with this timeless recipe that captures the essence of tradition and resilience.
Ingredients
- 2 cups all-purpose flour
- 1 cup sugar
- 1/2 cup butter
- 1 cup milk
- 2 teaspoons baking powder
- 1 teaspoon vanilla extract
- 2 eggs
Directions
-
Preheat your oven to 350°F (180°C) and grease a cake pan.
-
In a mixing bowl, cream together the butter and sugar until light and fluffy.
-
Add the eggs one at a time, beating well after each addition.
-
Stir in the vanilla extract.
-
In a separate bowl, sift together the flour and baking powder.
-
Gradually add the dry ingredients to the wet ingredients, alternating with the milk.
-
Pour the batter into the prepared pan and bake for 30-35 minutes or until a toothpick inserted into the center comes out clean.
-
Allow the cake to cool before serving.